


How to Draw a Floor Plan Online: A Step-by-Step Guide
A floor plan can make a renovation, home improvement project, or new build much easier to plan. Instead of trying to picture the finished space in your head, you can see how the rooms, doors, windows, and furniture fit together.
You do not need to be an architect to create one. With accurate measurements and a straightforward process, you can draw a useful floor plan online and make changes as your ideas develop.
What Is a Floor Plan?
A floor plan is a top-down drawing of a building or room. It normally shows walls, doors, windows, rooms, and important fixtures. Furniture can also be included to help you understand how the space will work.
People use floor plans for many different projects, including:
- Planning a home renovation
- Testing furniture arrangements
- Designing a new home
- Discussing ideas with contractors or designers
- Checking whether rooms have enough usable space
The level of detail depends on what you are trying to accomplish. A simple furniture layout does not need the same information as a construction drawing.
What You Need Before Drawing a Floor Plan
Good measurements are the best place to start. Measure the overall length and width of the space, then record the position of doors, windows, closets, stairs, and other fixed features.
If you are measuring an existing home, walk through each room and double-check the numbers. It is much easier to correct a measurement before drawing than after the entire plan has been built.
Before you start, gather:
- Room dimensions
- Door and window locations
- Fixed fixtures and built-ins
- Furniture dimensions
- Number of rooms required
- Basic layout requirements
A quick hand-drawn sketch can also help. It does not need to look professional. Use it to record the basic shape of the space and the position of its main features.
Step 1: Define Your Space Requirements
Before drawing walls, decide what the space needs to include.
For a home, this might mean deciding how many bedrooms and bathrooms you need, whether the kitchen should connect to the living room, or whether there is enough space for a separate office.
Write these requirements down first. They give you something to work toward and make it easier to compare different layouts later.
Step 2: Draw the Exterior Walls
Start with the outside shape of the building. Use your measurements to keep the proportions as accurate as possible.
Once the exterior walls are in place, you have a clear boundary for the rest of the plan. If the building has an extension, angled wall, or other unusual shape, include it now rather than trying to work around it later.
Step 3: Add Interior Walls
Next, divide the space into individual rooms.
Think about how the rooms connect rather than simply trying to create as many spaces as possible. Bedrooms generally benefit from privacy, while kitchens and living areas may work better when they are closer together.
Leave enough room for doors, furniture, and comfortable movement between spaces.
Step 4: Add Doors and Windows
Add doors and windows in their correct positions once the main room divisions are in place.
Door placement affects how people enter and move through each room. Windows affect natural light and can also determine where beds, desks, cabinets, and other furniture can go.
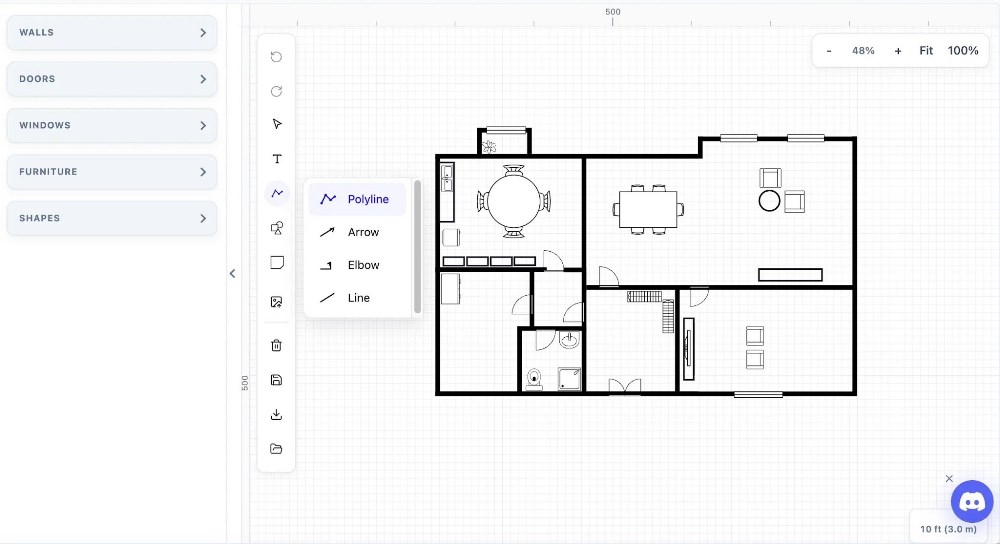
Step 5: Label Rooms and Add Dimensions
Add room names and important dimensions so the plan is easy to understand.
Dimensions are useful when checking whether furniture will fit or comparing the layout with the actual space. Keep labels clear and avoid adding unnecessary information that makes the plan difficult to read.
If you plan to share the drawing with a contractor or designer, clear measurements can also help avoid misunderstandings.
Step 6: Add Furniture and Fixtures
Furniture gives you a better idea of whether the layout works in everyday use.
Start with the main pieces, such as beds, sofas, dining tables, kitchen units, desks, and storage. Then look at how much space remains around them.
Try not to fill every open area. Empty space matters too, particularly around entrances, hallways, and frequently used rooms.
Step 7: Review the Layout
Before considering the plan finished, look at it as a whole.
Check whether doors open properly, windows remain accessible, and the main walking paths are clear. Think about everyday activities as well.
Ask yourself:
- Can two people comfortably use the kitchen?
- Is there enough room around the dining table?
- Can furniture be reached easily?
- Are the main walkways clear?
- Does each room have enough usable space?
A few small changes at this stage can make a noticeable difference.
Use an AI Floor Plan Generator for Faster Planning
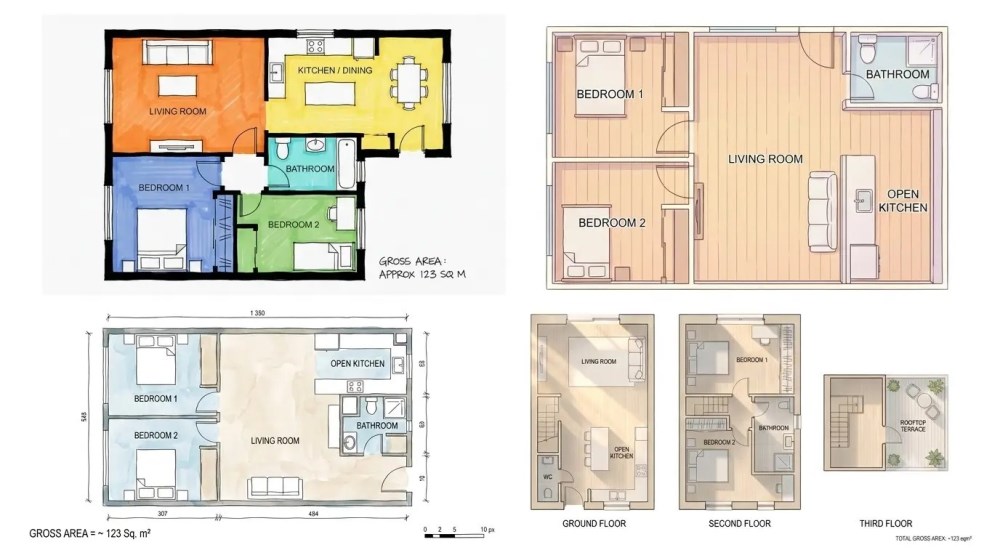
If you know what you want to include but are not sure how to arrange it, an AI floor plan generator can give you a useful starting point.
Instead of drawing every wall manually, you can begin with requirements such as room types, dimensions, and the number of spaces you need. The generated layout can then be reviewed and adjusted based on the actual requirements of the project.
This can be useful when you want to compare several ideas quickly before deciding which layout is worth developing further.
Common Floor Plan Mistakes to Avoid
Even a simple floor plan can run into problems if a few practical details are overlooked.
Watch out for these common mistakes:
- Using approximate measurements
- Forgetting door clearance
- Blocking windows
- Ignoring furniture dimensions
- Creating narrow walking paths
- Planning rooms separately instead of as a whole
It is worth checking these details before settling on a final arrangement. Fixing them on a digital plan is much easier than discovering the problem after construction or furniture delivery.
Create a Floor Plan With Confidence
A useful floor plan does not have to be complicated. Start with accurate measurements, decide what the space needs, and build the layout step by step.
Once the main rooms, doors, windows, furniture, and walking paths are in place, you can make changes with much more confidence. Whether you draw everything yourself or use an AI tool to explore the first few ideas, the goal is the same: create a layout that works well in the real world.


